
Saturday, June 5, 2010
Confession of a pregnant lady
Okay- now that the "cat's out of the bag" (never understood that phrase...) now you all know the real story of why we haven't posted anything on our blog for the past...13 weeks. Haha! First trimester was a time where I wanted to eat pretty much nothing and the look and smell of food left me in a icky state. Now that it's slowly going away, we are truly going to get this blog up and running again. I'm super excited, so keep those recipe ideas coming!!
Wednesday, May 26, 2010
Food Ideas

As you've noticed, we haven't posted many recipes lately...sorry about that! Don't worry, we haven't forgotten about the blog, we just haven't cooked as often as we used to in the past few weeks. This is about to change. We would like to post some new, some old, and some tried & true recipes but need some suggestions. Please comment and let us know what you would like recipes for or some recipes you've tried that you would like showcased on our blog. We are really excited to hear your suggestions!
Yours truly,
B&K
Thursday, May 13, 2010
Whole Wheat Pancakes

Sometimes there is nothing better than having breakfast for dinner, and sometimes its nice to get a little extra fiber in your diet! :) I got this recipe from my friend J and I was really surprised by how good they turned out. Usually when you make something with whole wheat it comes out dense and heavy, but by whipping the egg whites it keeps these light and fluffy. I ate them with some Strawberry Syrup which made them even more delectable!
Recipe:
1 1/2 C whole wheat flour
1TBS baking powder
3/4 tsp salt
3 TBS sugar
2 eggs, separated
1 1/2 C milk
3 TBS olive oil
1TBS baking powder
3/4 tsp salt
3 TBS sugar
2 eggs, separated
1 1/2 C milk
3 TBS olive oil
Mix together the flour, baking powder, salt and sugar.

Stir together the milk, egg yolks and oil, and add to the dry ingredients. Beat for 2 minutes.

In a separate bowl beat the eggs whites until the form stiff peaks. Gently fold the egg whites into the batter just until mixed.

Preheat and grease a griddle. Pour the batter onto the griddle. Cook the pancake until the bubbles begin to pop and then flip it over.

When the pancakes are done you can spread a little butter on top and the serve them while they are hot.

These pancakes are healthy and delicious and make a great breakfast or a great breakfast for dinner! Hope you enjoy them as much as we did.

Thursday, April 29, 2010
Rolo Cookies

As a kid Rolo's were one of my favorite candies, so when I first heard about these cookies I knew I had to try them. Thanks to our friend A I had such a chance a few weeks ago, and they did not disappoint. I am not sure where the original recipe came from, but we added a little of our own pizazz to it. These cookies are so quick and easy, but are so amazing that in one bite you'll never be the same!
Recipe:
1 pkg Devil's Food cake mix
2 eggs
1/2 cup oil
1/2 tsp vanilla
1/4tsp cinnamon
24 Rolos
Preheat the oven to 425 degrees. Mix together the cake mix, egg, oil, vanilla and cinnamon.

Roll the dough into a log

Cut the dough into 24 equal slices.

Take a slice of dough and place a Rolo in the middle of it.

Roll the dough into a ball around the Rolo.

Place on a greased or paper-lined cookie sheet and bake for 6 minutes.

Allow the cookies to cool for a few minutes.

These cookies are delicious when they are warm and the caramel is all gooey and just oozes out of them. They are also great after they cool when the caramel is chewy. Everyone will love the surprise you get when you bite into the extraordinary cookies. Rolo's just got even better!!!

Friday, April 2, 2010
Easter Egg Sugar Cookies

Growing up we were always excited for my mom to make these cookies for Easter. I never understood why she only made them once a year until I decided to make them for B one year. They really are delicious, but they are time consuming. It's not that they are hard to make, it just takes time with the glaze and the frosting decorations. So just a warning, these will take some time to make, but I promise the results will be well worth it and everyone will be mondo impressed with you.
Recipe
Cookies:
1C shortening
1 C sugar
2 eggs
1 C buttermilk
2 tsp baking powder
1/4 tsp salt
1tsp baking soda
5 cups flour
Preheat the oven to 350 degrees. Cream together the shortening and sugar, add the eggs and mix well.

If you don't have buttermilk you can make you own. Just add 1TBS vinegar to a 1C measuring cup and fill it the rest of the way with milk. Let it sit for a couple of minutes and you can use it as you would buttermilk. Add the buttermilk to the batter and slowly mix together.

In a separate bowl sift together the baking powder, salt, baking soda and flour. Slowly add these to the mix until a soft dough forms.

Roll the dough out onto a floured surface until about 1/4in thick. Use a cookie cutter to cut into eggs.

Place the cookies on a cookie sheet and bake at 350 for 7-10min. The trick is to get the cookies just done enough, if you bake them too long they get dry and if you don't bake them long enough they come out chewy and dense. You want them to just barely have a hint of turning golden brown on the edge. Let the cookies cool for a few minutes and then remove them from the sheet and let them cool completely before frosting. You can make the cookies the night before and store them in Tupperware overnight.

Glaze
6 C powdered sugar
1/3 C corn syrup
1 TBS vanilla
3 TBS butter
1/2 C water
1 TBS almond extract
Food coloring
In a sauce pan melt the butter, sugar, corn syrup and water on med-low heat, stirring constantly. Add the vanilla and almond and mix well.

Add a few drops of food coloring and stir until it is an even color and consistency. Remove from the heat.

Now the fun part begins. Take each cookie and carefully dip the front of it into the glaze. Be very careful because the glaze is hot and you may burn your fingers. You can also use a measuring cup to pour the glaze over the cookie. Just try it out until you find the way that works best for you.

Allow the excess glaze to drip back into the sauce pan. As you dip the cookies the glaze will start to thicken as it cools, if it get too thick just place it back on med-low heat stirring constantly until desired consistency.

Place the cookies on a cookie rack or wax paper and allow them to dry completely.

Icing
3 TBS shortening
3+ C powdered sugar
1tsp almond extract
water as needed
food coloring
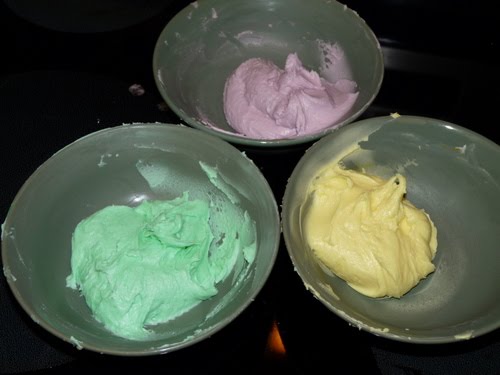
In a mixer beat the shortening, sugar and almond. Slowly add water a TBS at a time and whip until the frosting is creamy and smooth. If you add too much water you can add more sugar and keep adjusting it until you get a good consistency.

Separate the frosting into bowls and add food coloring of your choice.

And there you have it, yummy Easter cookies that everyone will enjoy. Like I said at the beginning, these cookies will take some time, but I guarantee you will LOVE them. The recipe makes about 3 dozen depending on the size of your cookie cutter, but they usually don't last for very long.You can also use this recipe for other holidays or special occasions as well.
Sunday, March 28, 2010
Parmesian Chicken with Homemade Maranara Sauce

Recipe:
Marinara Sauce
1/2 cup extra-virgin olive oil
1 large onion, finely chopped
3-4 garlic cloves, finely chopped
2 stalks celery, finely chopped
2 carrots, peeled and finely chopped
1/2 cup cooking wine (optional)
1/2 teaspoon sea salt
1/2 teaspoon freshly ground black pepper
2 large cans crushed tomatoes
2 dried bay leaves
Heat the olive oil in a large pot on med-high heat, add the onion and garlic and saute 10 minutes, stirring frequently.

The secret ingredient to this recipe is the carrots and celery. You don't taste either ingredient in the final sauce but it adds that meaty texture which makes this sauce so good! Chop the carrot and celery, I usually just toss them in my food processor, and add them to the onions. Add the salt and pepper, stir and add the cooking wine. We have tried it with red and white wine, both are delicious. Allow it to cook for another 10min until the vegetable are soft and the alcohol has cooked off. It will look kind of like baby food at this point so don't worry if it doesn't look appetizing yet.

Add the can of crushed tomato and bay leaf. Turn the heat down to low and let it simmer uncovered for 1 hour, stirring occasionally.

This recipe makes a lot of sauce, but you can always freeze what you don't use and save it for later.
Parmesan Chicken:
10-12 Chicken tenders
1 cup Milk
2 eggs beaten w/2 TBS water
1 cup flour
1 cup seasoned bread crumbs
1/4 cup Parmesan cheese
Olive oil
Pre-heat the over to 375 degrees. Mix the breads crumbs with the Parmesan cheese, and set up 4 dishes with the milk, flour, egg and bread crumbs. Take each piece of chicken and dip it in the milk, flour, egg wash and finally the bread crumbs.

Drizzle olive oil in a baking dish and place the breaded chicken tenders in it. Drizzle a little more olive oil on top of the chicken.

Bake the chicken uncovered at 375 until golden brown, about 30-40 min.

Serve the chicken over your favorite pasta and top it with the marinara sauce.

Sunday, March 21, 2010
Cheese Calzones
Lately, we've noticed an increase of eating calzones from the local pizza shop around the corner. We finally realized, "Hey, we can make this." So, we took K's favorite pizza crust recipe, found some sauce, and added some yummy cheese and made ourselves little calzones. This was very experimental so all we have for you is how to make the dough and put everything together. What you put in your calzone is up to you!
In a bowl, mix 1/4 Cup of water, yeast and sugar. Let it "proof" for 5 minutes until it is bubbly. Add the remaining water (3/4 cup), olive oil, 1 cup flour and wisk until smooth.

Add salt and the remaining flour (2 cups) and stir until the dough forms. Knead for a few minutes.

Oil a bowl with EVOO and place dough inside. Cover. Let dough rise for 30 minutes.

Pre-heat oven to 375 degrees. Once dough has risen, turn dough out on a flat surface and cut into six pieces. Roll each piece into a ball.

This is where the fun part begins. Each ball equals one personalized calzone. To make your calzone make sure you have a good pizza sauce. We love the pizza sauce from Trader Joes.

Also, have at least 1/3 cup of mozzarella cheese per person. We just made cheese calzones but you can add pepperoni, suasage...pretty much anything you want. Roll out the dough and spread out the pizza sauce. Add mozzarella cheese and whatever other ingredients you want. Fold the dough over itself and press the edges together. It also helps to roll the dough inside itself for a better hold.

On the top of the calzone you can put a little bit of olive oil or egg wash on the top. You can put some Italian seasonings on the top as well. Cut slits on the top of the calzones for ventilation.

Bake at 375 degrees for 20 minutes or until golden brown on the edges.

There you have it, your own personalized calzone filled with deliciousness!

These are super delicious and fun to make. They are great fresh from the oven or you can let them cool in the fridge and save them for lunch at work. Enjoy!
P.S.- this dough recipe makes amazing pizza too, just roll it out, add you toppings and bake at 500 degrees from 12-15min or until the crust is golden! :)
Here's the recipe:
Pizza Crust:
1 Packet yeast
2 tsp Honey
1 tsp Kosher salt
3 Cups All-purpose flour
1 Cup Warm water
1 tsp EVOO
In a bowl, mix 1/4 Cup of water, yeast and sugar. Let it "proof" for 5 minutes until it is bubbly. Add the remaining water (3/4 cup), olive oil, 1 cup flour and wisk until smooth.

Add salt and the remaining flour (2 cups) and stir until the dough forms. Knead for a few minutes.

Oil a bowl with EVOO and place dough inside. Cover. Let dough rise for 30 minutes.

Pre-heat oven to 375 degrees. Once dough has risen, turn dough out on a flat surface and cut into six pieces. Roll each piece into a ball.

This is where the fun part begins. Each ball equals one personalized calzone. To make your calzone make sure you have a good pizza sauce. We love the pizza sauce from Trader Joes.

Also, have at least 1/3 cup of mozzarella cheese per person. We just made cheese calzones but you can add pepperoni, suasage...pretty much anything you want. Roll out the dough and spread out the pizza sauce. Add mozzarella cheese and whatever other ingredients you want. Fold the dough over itself and press the edges together. It also helps to roll the dough inside itself for a better hold.

On the top of the calzone you can put a little bit of olive oil or egg wash on the top. You can put some Italian seasonings on the top as well. Cut slits on the top of the calzones for ventilation.

Bake at 375 degrees for 20 minutes or until golden brown on the edges.

There you have it, your own personalized calzone filled with deliciousness!

These are super delicious and fun to make. They are great fresh from the oven or you can let them cool in the fridge and save them for lunch at work. Enjoy!
P.S.- this dough recipe makes amazing pizza too, just roll it out, add you toppings and bake at 500 degrees from 12-15min or until the crust is golden! :)
Subscribe to:
Posts (Atom)
