Showing posts with label Cookies. Show all posts

Sunday, March 25, 2012

Lemon Snickerdoodles

I love snickerdoodles. They are my very favorite cookie. Snickerdoodles work for every occasion throughout the year and let's not forget how delicious they are. When I saw the recipe for Lemon Snickerdoodles, I whipped up a batch right away and I'm so glad I did. Can you say divine? I love how the lemon zest gives the cookie a settle hint of lemon that is not overpowering. I found this great recipe at Not So Humble Pie blog and modified it just slightly.

Recipe:
Zest of 1 lemon
1/2 C butter, softened
1 C Sugar
1 Tbl lemon juice
1 Egg
1 tsp. Vanilla
1/4 tsp. Cream of tartar
1/4 tsp. Baking soda
1 3/4 C Flour
1/4 C sugar to roll the dough in
Zest the lemon into a large mixing bowl. Add the butter and sugar and mix well. Continue mixing while adding the lemon juice, egg, vanilla, cream of tartar, and baking soda. Once mixed together add the flour a little at a time until fully incorporated.
Form the dough into a bowl and cover in plastic wrap. Place in the fridge for at least an hour.
Pre-heat the oven to 375 degrees.
Take the dough out of the fridge and remove wrap. Form small 1" balls and roll in the sugar. Place on a non-greased baking sheet and bake for 8-9 minutes.
Remove from oven and let cool on a wire rack. These cookies just as pretty as they are delicious. I've made two batched within one week and everyone who has tried one just loves them. You'll love them too, promise:-)
Enjoy!

Tuesday, February 7, 2012

Peanut Butter Heart Cookies

I saw this idea on Pinterest. Instead of a chocolate kiss top the cookie with a chocolate heart. So cute and perfect for Valentines Day. We have already posted an incredible peanut butter cookie recipe here but I didn't have shortening on me when I made these so I went with a butter based recipe instead. It was so good and matches the deliciousness of our other recipe. I sent these to the hospital with K and the cookies received raved reviews.

Recipe (adapted from allrecipes.com):
1 C unsalted butter
1 C Peanut butter
1 C Sugar
1 C Brown sugar
2 Eggs
2 1/2 C 
1 tsp Baking powder
1/2 tsp Salt
1 1/2 tsp Baking soda


Preheat oven to 375 degrees.
In a large mixing bowl, cream the butter and peanut butter together. Add the sugar, brown sugar and eggs and mix well.

In a separate bowl, mix the dry ingredients together. Once mixed, slowly add it to the butter mixture until full incorporated.

Form dough into balls. I like to roll the dough in sugar before placing them on the pan to bake.

Bake at 375 degrees for 8 minutes.

While the cookies are baking. Unwrap your chocolate hearts and set aside. Right when the cookies come out of the oven, place a chocolate heart on top of the cookie.


The chocolate heart will melt into the cookie but still keep it's shape. I loved the mixture of peanut butter with ooey goey chocolate. It was yum delish, especially with a cold glass of milk. Enjoy these treats for yourself or make them for your sweetheart. They will definitely enjoy them! :-)
Enjoy!

Friday, April 2, 2010

Easter Egg Sugar Cookies


Growing up we were always excited for my mom to make these cookies for Easter. I never understood why she only made them once a year until I decided to make them for B one year. They really are delicious, but they are time consuming. It's not that they are hard to make, it just takes time with the glaze and the frosting decorations. So just a warning, these will take some time to make, but I promise the results will be well worth it and everyone will be mondo impressed with you.


Recipe
Cookies:
1C shortening
1 C sugar
2 eggs
1 C buttermilk
2 tsp baking powder
1/4 tsp salt
1tsp baking soda
5 cups flour

Preheat the oven to 350 degrees. Cream together the shortening and sugar, add the eggs and mix well.


If you don't have buttermilk you can make you own. Just add 1TBS vinegar to a 1C measuring cup and fill it the rest of the way with milk. Let it sit for a couple of minutes and you can use it as you would buttermilk. Add the buttermilk to the batter and slowly mix together.


In a separate bowl sift together the baking powder, salt, baking soda and flour. Slowly add these to the mix until a soft dough forms.


Roll the dough out onto a floured surface until about 1/4in thick. Use a cookie cutter to cut into eggs.


Place the cookies on a cookie sheet and bake at 350 for 7-10min. The trick is to get the cookies just done enough, if you bake them too long they get dry and if you don't bake them long enough they come out chewy and dense. You want them to just barely have a hint of turning golden brown on the edge. Let the cookies cool for a few minutes and then remove them from the sheet and let them cool completely before frosting. You can make the cookies the night before and store them in Tupperware overnight.


Glaze
6 C powdered sugar
1/3 C corn syrup
1 TBS vanilla
3 TBS butter
1/2 C water
1 TBS almond extract
Food coloring


In a sauce pan melt the butter, sugar, corn syrup and water on med-low heat, stirring constantly. Add the vanilla and almond and mix well.


Add a few drops of food coloring and stir until it is an even color and consistency. Remove from the heat.


Now the fun part begins. Take each cookie and carefully dip the front of it into the glaze. Be very careful because the glaze is hot and you may burn your fingers. You can also use a measuring cup to pour the glaze over the cookie. Just try it out until you find the way that works best for you.


Allow the excess glaze to drip back into the sauce pan. As you dip the cookies the glaze will start to thicken as it cools, if it get too thick just place it back on med-low heat stirring constantly until desired consistency.


Place the cookies on a cookie rack or wax paper and allow them to dry completely.


Icing
3 TBS shortening
3+ C powdered sugar
1tsp almond extract
water as needed
food coloring

In a mixer beat the shortening, sugar and almond. Slowly add water a TBS at a time and whip until the frosting is creamy and smooth. If you add too much water you can add more sugar and keep adjusting it until you get a good consistency.


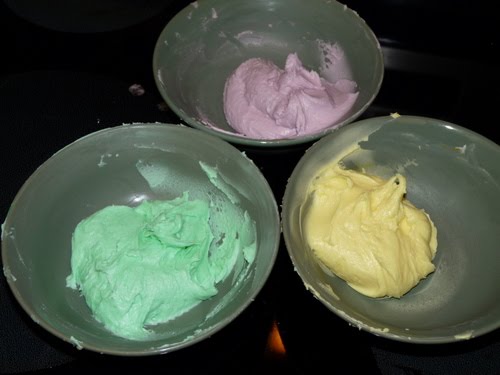
Separate the frosting into bowls and add food coloring of your choice.


Use a piping bag to decorate the cookies. For Valentine's Day, Grandma & Pops D gave us a Mechanical Pastry Bag from Williams-Sonoma. We absolutely love this baking tool as it has made icing and decorating easy to do with great results. I like to use one color at a time and try to use different tips so that each cookie ends up being unique. Let the frosting dry for a few minutes.


And there you have it, yummy Easter cookies that everyone will enjoy. Like I said at the beginning, these cookies will take some time, but I guarantee you will LOVE them. The recipe makes about 3 dozen depending on the size of your cookie cutter, but they usually don't last for very long.You can also use this recipe for other holidays or special occasions as well.


Wednesday, March 17, 2010

Shamrock Cookies

These shamrock cookies are a holiday favorite on St. Patrick's day. It's another great recipe from Betty Crocker's Cooky Book They are very easy to make and delicious with milk. I love the hint of peppermint in these cookies too!

Here's the recipe:
1 C. Shortening
1 C. Powdered sugar
1 Egg
1 1/2 tsp. Peppermint extract
2 1/2 C Flour
1 tsp. Salt
1 1/2 tsp. Green food coloring

In a large mixing bowl, mix together shortening, sugar, and egg until blended.
Add the extract, flour, and salt and mix well.

Add the food coloring

Mix until the green color is evenly distributed within the dough.

Now you are ready for the fun part of making the shamrocks. Take the dough and roll into three or four little balls (depending on how you want to shape the shamrocks) and flatten together. Shape a stem and attach.

Bake for approx 9 minutes. I must admit, my first batch I over cooked and they turned out hard. My second batch I under cooked slightly and they turned out perfect. Set the timer for 9 minutes and then go from there.
These cookies are so much fun to make and delicious to eat. You can add green sprinkles on them before baking if you really want them to dazzle! Enjoy!

Saturday, January 9, 2010

Peanut Butter Cookies

One of K's all-time loves are peanut butter cookies. Every time we are at a bakery he always purchases one (or maybe two). The surprising thing is we do not always make them at home. There's no reason behind this, I think the peanut butter cookie gets lost in the jumble of cookies to make. This sad discovery is now about to change, starting today. From our beloved Betty Crocker 1963 "Cooky Book" we enjoy one of life's greatest little treasures...a yummy peanut butter cookie with a glass of milk.

Here's the recipe:

1/2 C Shortening
1/2 C Peanut butter (we love creamy but crunchy works as well)
1/2 C Sugar
1/2 C Brown sugar (light or dark)
1 egg
1 1/4 Flour
1/2 tsp Baking powder
3/4 tsp Baking soda
1/3 tsp Salt

Start by mixing the shortening, peanut butter, sugar and eggs with a mixer. Make sure it is mixed all the way through.

Sift you flour into a large bowl. Add the remaining dry ingredients. Slowly add the dry ingredients to the shortening mix.

Taste test the cookie dough... okay you don't have to but I can't resist:-) Wrap the dough up and place in the fridge to chill.

Pre-heat oven to 375. We keep the dough in the fridge until the oven is heated.

Roll out dough into small balls. Roll the cookie dough in sugar and place on the cookie sheet. Using a small cup gently press the dough. Using a fork make a criss-cross pattern on the top of each cookie. Bake in the oven for 8-10 minutes or until golden.

While the cookie dough bakes, place the remaining dough back into the fridge. Continue this pattern until all the dough is gone.

Let the cookie rest on pan for a few minutes before cooling them on a wire rack or paper towel. Serve with a nice cold glass of milk.

These cookies are deliciously rich and amazingly delish. We could make them everyday. They are great to keep for yourself or give to family, friends, or neighbors. Enjoy!

Saturday, July 11, 2009

Chocolate Chip Cookies (CCC)

First recipe of the blog is a chocolate chip cookie recipe and I think that it's pretty fitting since CCC are a standard in most Amercian households. I came across this recipe on Omnomicon. It was voted the number one chocolate chip cookie and so I had to try it out.

Recipe:
Pre-heat oven to 375

1 cup butter (room temp.)
2 cups flour

1 cup brown sugar
2 cup oatmeal (fine)

1 cup sugar
1/2 tsp. salt

2 eggs
1 tsp baking powder

1 tsp. vanilla
1 tsp. baking soda

12 oz chocolate chips
4
oz grated chocolate bar (18.5 rectangles)
2 Tbl. sugar


Some surprising additions to the recipe is the finely chopped oatmeal and a grated chocolate bar. Don't judge! It brings an additional goodness I never realized was missing from a CCC before.

First step, cream the butter and sugars together. (Technically this is the second step since you needs to pre-heat the over to 375 first...maybe that can be step zero)

Add the eggs and vanilla ...

...and beat until fluffy.

In the meantime, take 2 cups of oatmeal and place in food processor, blender, magic bullet... basically anything that can turn it into a very fine powder.
Mix the dry ingredient together- flour, finely ground oatmeal, salt, baking powder, and baking soda. After all of the dry items are mixed together, slowly add it, little by little, to your egg-sugar mixture.
Take your chocolate bar and grate it into little bitty chocolate shavings. I didn't want to spend time grating it so I put it in my magic bullet... you can also use a food processor as well.

Tip: Freeze your chocolate bar before hand. It makes it easier to use and it wont melt on you while you are grating it.
Eat heaping amounts of dough to make sure it taste good...
Take 2 tablespoons of granulated sugar and place in small bowl. Drop spoonfuls of dough into the bowl to add a small layer of sugar. This is actually a trick my mother-in-law taught me. I can't eat chocolate chip cookies without this small but meaningful step.
Bake dough at 375 degrees for 8-10 minutes. It actually took me 10-11 minutes to bake. I suggest setting the timer for 8 minutes and then add a minute until you see a goldenness to the cookies. Let the cookies rest on the pan for a few minutes until they harden and cool a little.

Then move your cookies to a cooling rack or paper towel. In my case, I used both!I have an wire cooling rack and I hate it when it leaves lines in my cookies, so I place a paper towel over it and wha-la!
The finished result is an absolutely delicious and milk dunk-able chocolate chip cookie!!
As you can see, this recipe is very easy to make and you don't need expensive ingredients or weird tools to make them. You will love them and you might actually become the popular kid at school... results have varied though. :-)