The world knows my favorite cookies are snickerdoodles. I've also tried snickerdoodle ice cream and cupcakes, both of which are delish. I was on Pinterest and saw this recipe for muffins. Of course I had to try them out. The finished product is fantastic. A semi-crispy outer shell of cinnamon sugar and a sweet & fluffy inside. Top it off with a mug of apple cider and breakfast is served. Thank you Eat Me, Delicious for this excellent recipe!
Recipe (slightly modified):
2 sticks unsalted butter (room temperature)
1 C. sugar
2 tsp. vanilla
2 eggs
3/4 tsp. baking powder
3/4 tsp. baking soda
3/4 tsp. cream of tartar
1/4 tsp. & a pinch nutmeg
1 1/4 C. sour cream
2 1/4 C. flour
1/2 C sugar & 1 TBL cinnamon (put in shallow bowl)
Pre-heat over to 350 degrees and grease a muffin pan with baking Pam.
Cream the butter and sugar until soft. Add vanilla and eggs one at a time and mix well.
In a medium bowl, mix the dry ingredients together.
Add half of the dry mixture to the egg mixture and mix. Then add the sour cream and mix. Pour in the remainder of the flour mixture and mix well.
Using an ice cream scoop, scoop out dough and drop in the shallow bowl full of cinnamon-sugar. Roll the dough in sugar until completely covered and drop into the muffin pan.
Bake for 20-22 minutes or until golden brown
Like I said the end result was so scrumptious. We stood around the kitchen eating these and drinking apple cider for breakfast.
Enjoy!
Saturday, November 5, 2011
Wednesday, October 26, 2011
Homemade Marshmallows
Thank you Smitten Kitchen for this amazing recipe. When I found her blog, I completely fell in love and had to try these out. I wanted to make a fun party favor for the upcoming Activities Day Halloween party. I received an email from Katie-did Design's sent out a freebie "Ghost Poop" label and thought it would be super fun to hand these out to the girls at the party. Of course, store bought marshmallows weren't enough and so I did my first attempt at homemade marshmallows. They turned out perfect! Listen- ladies and gents, if I can do it...so can you!! They're soft, fluffy and scrumptious. Perfect for hot cocoa, s'mores and ghost poop.
Recipe:
About 1 C confectioner's sugar
3 1/2 envelopes unflavored gelatin
1 C cold water (divided)
2 C granulated sugar
1/2 C light corn syrup
1/4 tsp. salt
2 Large egg whites
1 Tbl vanilla
In a large bowl pour 1/2 C cold water. Sprinkle the gelatin on top of the water. Let it sit and soften.
Using a 6 quart (or 3 quart) heavy sauce pan heat the sugar, corn syrup, salt, and remaining 1/2 C of water on low until sugar dissolves.
Using a cooking thermometer, turn the heat up to moderate and boil the mixture until it reaches 240 degrees. This took about 10 minutes for me. Once it reached 240 degrees, remove from heat and pour into the large bowl containing the gelatin. Stir until gelatin is dissolved.
In a separate bowl, whip egg whites until they hold stiff peaks. Set aside.
Whip sugar/gelatin mixture on high for 6-10 minutes or until the mixture has tripled in size.
Add the egg whites and vanilla beat just until it's combined. Do not overstir the mixture. Pour mixture into the oiled pan. Don't worry about scrapping the bowl, it can become messy, Just get as much as you can easily get into the pan.
Dust the top with a layer of powdered sugar. Place in the refrigerator uncovered until firm. If you're in a rush, give it at least three hours. I waited until the next morning just to be on the safe side.
Run a knife around the edges of the pan and slide the marshmallows onto a cutting board.
Using a oiled pizza cutter (or sharp knife) cut the marshmallows into 1x1 cubes. I sprayed Pam onto our pizza cutter and it worked perfectly. Using the remaining powdered sugar in the pain, roll the marshmallow cubes through the powdered sugar so all sides are covered. It helps get rid of any stickiness.
There you have it! You can kiss those jet-puffed mallows good-bye with this super simple but delicious recipe.
Thanks to Katie-did Design, I was able to print off these fun labels to make "Ghost Poop"!
Enjoy!
Recipe:About 1 C confectioner's sugar
3 1/2 envelopes unflavored gelatin
1 C cold water (divided)
2 C granulated sugar
1/2 C light corn syrup
1/4 tsp. salt
2 Large egg whites
1 Tbl vanilla
Oil a 13x9x2 metal baking pan and dust the bottom and sides with powdered sugar. I was having a bit of trouble getting the powdered sugar to stick to the sides but Kyle had a genius idea of putting powdered sugar in the pan then turning the pan and tapping the bottom while the sugar falls into place...what a smartie.
In a large bowl pour 1/2 C cold water. Sprinkle the gelatin on top of the water. Let it sit and soften.
Using a 6 quart (or 3 quart) heavy sauce pan heat the sugar, corn syrup, salt, and remaining 1/2 C of water on low until sugar dissolves.
Using a cooking thermometer, turn the heat up to moderate and boil the mixture until it reaches 240 degrees. This took about 10 minutes for me. Once it reached 240 degrees, remove from heat and pour into the large bowl containing the gelatin. Stir until gelatin is dissolved.
In a separate bowl, whip egg whites until they hold stiff peaks. Set aside.
Whip sugar/gelatin mixture on high for 6-10 minutes or until the mixture has tripled in size.
Add the egg whites and vanilla beat just until it's combined. Do not overstir the mixture. Pour mixture into the oiled pan. Don't worry about scrapping the bowl, it can become messy, Just get as much as you can easily get into the pan.
Dust the top with a layer of powdered sugar. Place in the refrigerator uncovered until firm. If you're in a rush, give it at least three hours. I waited until the next morning just to be on the safe side.
Run a knife around the edges of the pan and slide the marshmallows onto a cutting board.
Using a oiled pizza cutter (or sharp knife) cut the marshmallows into 1x1 cubes. I sprayed Pam onto our pizza cutter and it worked perfectly. Using the remaining powdered sugar in the pain, roll the marshmallow cubes through the powdered sugar so all sides are covered. It helps get rid of any stickiness.
Thanks to Katie-did Design, I was able to print off these fun labels to make "Ghost Poop"!
Enjoy!
Saturday, October 22, 2011
Slow Cooked Chili
Fall equals crisp evenings, colorful leaves, and football. And what's better than watching football on a nice crisp evening with a bowl of chili? I made this chili a few weeks ago and invited some friends over to watch a BYU football game. Thank you allrecipes.com for this great recipe! I made it in the morning and stirred it occasionally during the day. When game-time came around it was ready. The aroma was mouth-watering..seriously our house smelled divine. This hearty chili is very simply to make so get your crock pots ready, it's chili time.
Chop the onions and peppers as well as mince the garlic. Set aside.
In your crock pot/ slow cooker add everything except the cheese and fritos. Cover and cook on low for 8-10 hours (or high for 4 hours). Stirring occasionally.
An hour before you're ready to eat taste and season with salt and pepper. Also, feel free to add garlic powder and chili powder for taste to. I chose an hour because I want those spices to really get infused with the sauce but you don't want it to settle too much or it may get to salty.
Soo good! I should've taken the picture when the cheese was melty and gooey but I couldn't wait to eat it. I really enjoyed this recipe. It's simple to make and incredible to eat. Enjoy!
Recipe:
- 2 pounds ground beef
- 2 (16 ounce) cans kidney beans, rinsed and drained
- 2 (14.5 ounce) cans diced tomatoes, undrained
- 1 (8 ounce) can tomato sauce
- 2 medium onions, chopped
- 1 green pepper, chopped
- 2 cloves garlic, minced
- 2 tablespoons chili powder
- 2 teaspoons salt
- 1 teaspoon pepper
- Shredded Cheddar cheese
- Frito Chips
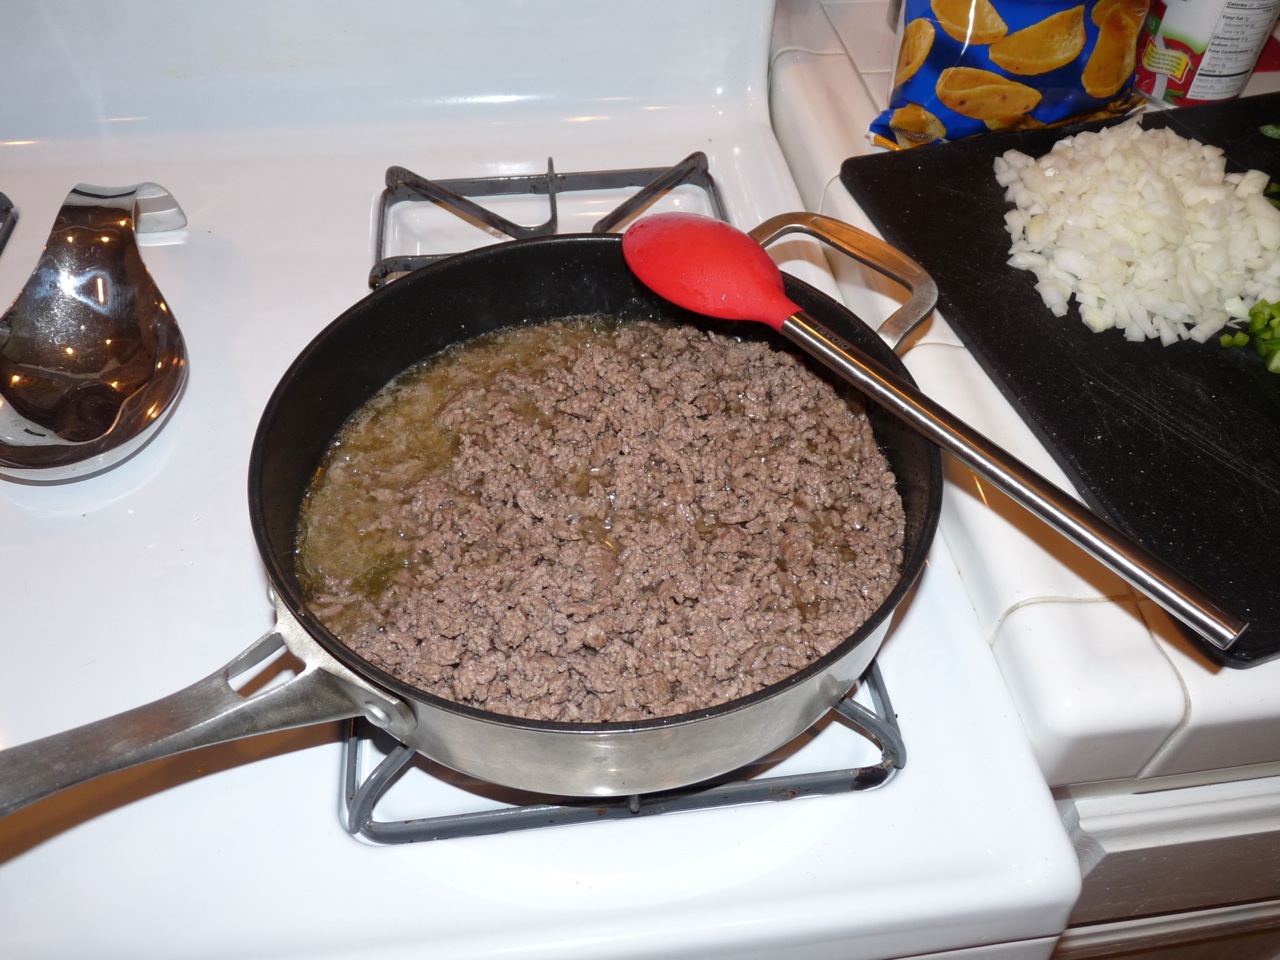
- This chili can serve up to 10 people and can easily be chopped in half if you need to. Start with browning the meat. Place your ground beef in a pan of heated olive oil. Cook until brown all the way through. Here's the deal, I usually buy lean ground beef but for chili and burgers you really want to get a fattier selection. The reason is the flavor and juicyness. You really want a chili that is hearty and full of flavor. So give in every once in awhile and get a good meat for this recipe. With that said, don't forget to drain the excess grease when the meat is fully browned.
Chop the onions and peppers as well as mince the garlic. Set aside.
In your crock pot/ slow cooker add everything except the cheese and fritos. Cover and cook on low for 8-10 hours (or high for 4 hours). Stirring occasionally.
An hour before you're ready to eat taste and season with salt and pepper. Also, feel free to add garlic powder and chili powder for taste to. I chose an hour because I want those spices to really get infused with the sauce but you don't want it to settle too much or it may get to salty.
Soo good! I should've taken the picture when the cheese was melty and gooey but I couldn't wait to eat it. I really enjoyed this recipe. It's simple to make and incredible to eat. Enjoy!
Friday, October 21, 2011
Sesame Chicken Pasta Salad
- Last week I was asked to bring a pasta salad to the RS dinner. I wanted to try something new so I looked online and found this great recipe on allrecipe.com. Once prepared I ate a small bowl and I was hooked. I decided to make it again last night to blog about it. Both K & C agree, it's quite tasty. Now I have a confession to make...I do not eat leftovers. But I broke this rule for lunch and had some of this dish. It was so amazing. I love how the flavors come alive and can't wait for you to try it.
Recipe:
- 1 (12 ounce) package rotelle pasta
- 1/4 cup sesame seeds
- 1/4 cup EVOO
- 3/4 cup soy sauce
- 1/2 cup white wine vinegar
- 3 1/2 tablespoons sugar
- 2 cups cubed, cooked chicken
- 1/4 cup chopped fresh parsley
- 1/2 cup coarsely chopped green onion
- 4 cups torn fresh spinach leaves
I used rotelle pasta but feel free to use your favorite pasta for this dish. Bring to boil a pot of lightly salted water. Add pasta. Cook pasta and drain when done. Set aside in a bowl.
While cooking the pasta I made the sauce. This recipe is great because you can make everything at the same time.
Note: If you are using frozen chicken breast, now would be the time to defrost them.
Heat olive oil in a pan. Once oil is warm pour in the sesame seeds and cook on medium-high heat. You will want to stir the sesame seeds until they are golden brown (approx. 3 minutes).
Once the seeds are toasted, take off the heat. Add soy sauce, white wine vinegar and sugar. Caution: Be careful when adding the soy sauce to the pan. The oil and seeds will bubble up. Pour in the soy sauce slowly! I didn't realize this when I first made this recipe, boy was I surprised haha! Put in a heat safe container and put aside.
So, I forgot to take pictures of the chicken...opps! Though I did get a shot of this lovely pan with oil heating in it...
Beautimous right? Haha. Well, I used three defrosted chicken tenders for this recipe. I placed the chicken in the pan once the oil was hot. Cooked on medium-high heat until cooked all the way through. While the chicken was cooking, I seasoned it with sea salt and a little bit of garlic salt for flavor. Once fully cooked, I placed it on a cutting bord and cut into small cubes.
Mix the pasta, 1 Cup of the soy sauce mixture and chicken in a large bowl. Cover and place in the refrigerator for 2+ hours. This is the best part because you can run errands or watch a few episodes of Vampire Diaries and the pasta salad is marinating to perfection. The noodles and chicken are soaking in that tangy sauce and you don't have to do a thing:-)
When you are ready to serve the salad add the green onions, parsley and spinach to the large bowl. Add more of the soy sauce mixture for flavor. It's ready to be devoured!
By far, my favorite pasta salad dish. It's nice, chilled and infused with yumminess, you really can't go wrong! Enjoy!
Wednesday, August 31, 2011
Banana Cupcakes with Honey-Cinnamon Frosting
Umm...hello! I know, I know it has been awhile with many promises of return but hey I'm back and I do have a great recipe for you! Recently I've been browsing the MarthaStewart.com website and drooling over all of her cupcake recipes. Today I've been watching re-runs of cupcake wars and finally I had enough. I had to make cupcakes. It wasn't a want but a NEED. Haha! Well, I made these on a whim and just fell in love. Thank you Martha!!
Whisk together the flour, sugar, salt, baking powder & soda. Using a spatula make a well in the middle of the flour mixture. I'll come back to that later.
Mash up 4 ripe bananas. I used our magic bullet but of course you can use a food processor, blender or go the old-fashion way and mash them with a fork.
(Side note- for those with little ones, put aside a bit of the mashed bananas and give it to your babies at their next meal.)
In the well that you made in the middle of the flour mixture, pour in the bananas, eggs, melted butter & vanilla. Fold the ingredients together but DON'T overmix!
Yum! Taste the batter if you'd like, it's delicious!
Fill the cupcake liners (about 3/4 the liner) and place in the over. Bake for 25-30 minutes or until golden brown. Use the toothpick method to make sure your cupcakes are baked all the way through.
Haha! At this point I pulled out veggies to try to even out the amount of batter I ate and the amount of cupcakes I will be eating:-)
When the cupcakes are done, let them cool on a wire rack. Once they are cool you can frost to your hearts delight.
For photo sake I double lined the cupcakes yet the second layer started to peel...don't judge! Haha:-) But really, who cares about those silly liners anyways right? The real stars are the cupcakes! I fell in love with this simple recipe. The cupcakes turned out very light and fluffy and the frosting was a perfect companion of sweetness.
Enjoy!
Recipe: (makes 12 cupcakes)
1 1/2 C. all-purpose flour
3/4 C Sugar
1 tsp baking powder
1/2 tsp baking powder
1/4 tsp salt
1/2 C. butter (melted)
4 ripe bananas mashed
2 large eggs
3/4 tsp vanilla
Preheat oven to 350 and line your cupcake pan with liners.
Whisk together the flour, sugar, salt, baking powder & soda. Using a spatula make a well in the middle of the flour mixture. I'll come back to that later.
Mash up 4 ripe bananas. I used our magic bullet but of course you can use a food processor, blender or go the old-fashion way and mash them with a fork.
(Side note- for those with little ones, put aside a bit of the mashed bananas and give it to your babies at their next meal.)
In the well that you made in the middle of the flour mixture, pour in the bananas, eggs, melted butter & vanilla. Fold the ingredients together but DON'T overmix!
Yum! Taste the batter if you'd like, it's delicious!
Fill the cupcake liners (about 3/4 the liner) and place in the over. Bake for 25-30 minutes or until golden brown. Use the toothpick method to make sure your cupcakes are baked all the way through.
Haha! At this point I pulled out veggies to try to even out the amount of batter I ate and the amount of cupcakes I will be eating:-)
Frosting:
1 1/4 C powder sugar
1 Tbls Honey
1/4 tsp cinnamon
1/2 C butter (room temp)
While the cupcakes are baking you can start on your frosting. Add all of the ingredients together and whip. Taste and add more flavor if needed.
When the cupcakes are done, let them cool on a wire rack. Once they are cool you can frost to your hearts delight.
For photo sake I double lined the cupcakes yet the second layer started to peel...don't judge! Haha:-) But really, who cares about those silly liners anyways right? The real stars are the cupcakes! I fell in love with this simple recipe. The cupcakes turned out very light and fluffy and the frosting was a perfect companion of sweetness.
Enjoy!
Sunday, June 12, 2011
We moved to the OC
So this past year has flown by and we can't even believe we're in JUNE!! Ahhh! Where has time gone? During this time we have been spending a lot of time and energy with our gorgeous little one, K graduated and we moved! I'm hoping to post new recipes soon...maybe something with Orange in it as that is where K's residency is? Haha...we will see!
Tuesday, March 1, 2011
Chicken with Red Wine Sauce
K and I really love to cook with cooking wine (red & white). The alcohol in the wine is cooked off but leaves the food with a delicious, rich and savory taste. Basically when we have a meal that has wine in it we either grab the cooking wine or go down the wine aisle and find the cheapest one. Here's a great recipe that is very simple but has a sweet and savory taste.
Like I said the recipe is super easy with minimal ingredients
Heat oil up in pan on medium heat. Add garlic and chicken. Cook chicken until browned and cooked on both sides. While the chicken is cooking get together the rest of the ingredients.
Turn the heat down to simmer. Sprinkle paprika over the chicken and add the wine and brown sugar to pan. Mix together and cover for 20 minutes.
There you have it. I was surprised by the light sweet flavor of the chicken. We paired it with white rice and I loved the outcome.
Recipe:
1-2 Tbls olive oil
2 tsp minced garlic
1- 1 1/2 lbs. chicken
1 tsp paprika
1/2 C brown sugar
1/2 C red wine
salt & pepper to taste
Like I said the recipe is super easy with minimal ingredients
Heat oil up in pan on medium heat. Add garlic and chicken. Cook chicken until browned and cooked on both sides. While the chicken is cooking get together the rest of the ingredients.
Turn the heat down to simmer. Sprinkle paprika over the chicken and add the wine and brown sugar to pan. Mix together and cover for 20 minutes.
There you have it. I was surprised by the light sweet flavor of the chicken. We paired it with white rice and I loved the outcome.
(Okay- this picture is awful! But it smelled so good we dug in and then remembered we needed a shot)
Enjoy!
Subscribe to:
Posts (Atom)