Friday, January 29, 2010

Cinnamon Scones

Yes, it's true... I'm a scone-a-holic. Not just because they are mouth-watering and delicious, though that is a BIG part. But since K adapted this super easy recipe we can't find reasons not to make them on any given day. These aren't your typical scones that can sometimes be a bit, how do you say, dense? These scones are a lot lighter. You can make them plain or do what we do and add some cinnamon and sugar on the top.

Here's the recipe:
1 C flour
2 TBS sugar
1 tsp baking powder
1/8 tsp baking soda
1/4 C cold butter
1/3 C buttermilk
Cinnamon and Sugar (1tsp sugar and 1/4tsp cinnamon)

In a bowl sift together the flour, sugar, powder and soda. Cut the butter into chunks and add it to the dry mix. Use a pastry cutter (or you can use two knives or even a large fork) to cut the butter into the flour until it is crumbly and well mixed.

Add the buttermilk and mix just until the dough comes together. If you don't have buttermilk (and let's be honest who just happens to have buttermilk in their fridge???) just put 1tsp white vinegar in your measuring cup, fill it the rest of the way with milk and let it sit for a couple of minutes. Once the dough comes together place it on a floured surface and pat it into a 5-in circle.

Use a knife to score the top of the dough into 6 slices. Then sprinkle the top with the cinnamon and sugar mix.
Bake at 375 for 20-25 min, or until it just begins to turn golden brown on the edge. Remove from the oven and place on a rack to cool for a few minutes, then break it into wedges.

These scones are best when they are warm and fresh. You can also go crazy and serve them with ice cream and fresh berries!

Sunday, January 24, 2010

Chicken & Rice Casserole

My dearest friend, K-bear, we heard your plea and found a recipe idea for your dinner. Here is a cost-effective, easy to make, and crazy delicious chicken and rice casserole that you'll love! All you do is chop, put in a pan, and bake. So simple, so good, and super cheap.

Here's the recipe:

1 can Cream of Chicken soup
1 1/2 C water
3/4 C uncooked rice
1/2 tsp Garlic powder
1/4 tsp black pepper
1/2 tsp salt
1 C chopped celery
1 C chopped broccoli
1/4 C chopped onion
3 chopped garlic cloves
1 lbs chicken cut into chunks

Heat the oven to 375 degrees. Cut the chicken into bit size chunks and season it with the salt, pepper and garlic powder.

Cut the broccoli into small florets

Slice the celery

Chop the onion and

In a large casserole dish mix together the water and soup until well blended. Then add the remaining ingredients and stir thoroughly.

Cover with aluminum foil and bake for 50-60min or until the rice is tender. It's crucial you cover with the aluminum foil because that it what cooks the rice and holds the heat inside the dish. Don't put this in the oven without it or your dish won't turn out.


This is a quick solution to any dinner party. Even though it is simple it is quite delicious and there are lots of variations you can add. For example you can add bell pepper or mixed veggies. When it is done you can even try topping it with cheese. The possibilities and endless, but either way this dish is guaranteed to please! Enjoy!

Friday, January 22, 2010

Classic Fluffy Waffles

Here's a very quick and easy waffle recipe that are perfect for Saturday morning. Pair with strawberry syrup or your favorite syrup. We got the recipe from "The New Book of Waffles and Pizzelles" by Donna Rathmell German

Here's the recipe:

2 eggs, at room temp and separated
2 C flour
2 tsp baking powder
1/4 tsp salt
2 TBS sugar
1 1/2 C milk
1/2 C butter melted and cooled

Start by sifting together all of the dry ingredients.


Whisk together the egg yolks, butter and milk. Add the mixture to the dry ingredients, but mix it by hand just until they are blended. Don't over-blend!

In a separate bowl, use a mixer to beat the egg whites until the form stiff peaks. Then gently fold them into the batter just until they are all mixed in. Again, the key with these is to not over mix it.

Now all you have to do is pour them into a hot waffle iron. I usually spray a little bit of PAM on it first just so they are easy to take out. This recipe makes 2 large waffles, if that is more waffle than you want, you can always half the recipe.

We love using this recipe because we can always double or triple it when we have company or just make "as is" when it's just the two of us. These waffles are easy and delicious! They are best served hot out of the waffle iron, with butter and syrup. Enjoy!

Sunday, January 17, 2010

Strawberry Cupcakes

I love cupcakes and I am obsessed with strawberries so it's no surprise that we have a lot of recipes for both items. Here is a fantastic recipe for Sprinkle's Strawberry Cupcakes taken off of Martha Stewart's website. We took the recipe and made a few changes in the process to make a delicious but light cupcake.

Here's the recipe:

1 C Strawberries (fresh or frozen)
1 1/2 C Flour (sifted)
1 tsp Baking powder
1/4 tsp Coarse salt
1/4 C Milk (room temperature)
1 tsp Pure vanilla extract
1/2 C unsalted butter (room temperature)
1 C sugar
1 large egg (room temperature)
2 large egg whites (room temperature & whipped)
Frosting

Pre-heat to 350 degrees. Line your muffin pan with cupcake liners.


Place strawberries in a magic bullet or food processor. Puree. Here's where we changed things a bit. Place the puree into a saucepan and heat on low for 15-20 minutes, stirring frequently. The goal is still thicken the strawberry puree. (Of course you can skip this part but I would do it. It really helps bring out the strawberry flavors) Take 1/3 cup of the puree and put aside, you will also need to save 3TBS for the frosting.

In a medium bowl, sift the flour then mix in the baking powder and salt. In a separate bowl mix the 1/3 cup strawberry puree, milk and vanilla. Here is where we added an extra step, in a third bowl beat the egg whites until they form stiff peaks.

In the mixer cream the butter on med-high until it is light and fluffy, then gradual add the sugar beat until light and fluffy again. Then add the whole egg and mix well. Turn the mixer down to low speed and add half of the flour mixture and mix until it is just blended, don't overmix it. Then add the strawberry mixture and blend just until mixed. Follow by adding the rest of the flour mixture and blend together.

Now comes the fun part, add the stiff eat whites and gently fold them (by hand) into the batter being careful not beat it or over-mix it.

Pour the batter into prepared muffin tin, they should all be about 2/3 full, and bake them for 18-22min until the cupcakes are firm the touch and a toothpick in the center comes out clean.

Allow the cupcakes to cool in the tin for a few minutes, then remove them from the tin and cool on a wire rack.
Strawberry Frosting:
1 cup butter, firm and slightly cold

Pinch of coarse salt

3 1/2 cups powdered sugar
, sifted
1/2 tsp vanilla

3TBS strawberry puree

Whip the butter and salt until light and fluffy. Then sift in the powdered sugar and beat until mixed. Add the strawberries and vanilla and stir just until mixed.

Once the cupcakes have completely cooled, top each one with a generous dollop of frosting.

Your cupcakes are ready to be eaten! You can add strawberries to the top of the cupcake or leave them plain. If you're making this treat for Valentines, you can even try cutting them into hearts as seen in the Strawberry Shortcake recipe.

Our first time making these cupcakes we were like, "Wow, these are amazing!!" No lie! The cupcake is sweet but not overpowering. I heart the lightness of the cupcake and the fresh taste of strawberries in the frosting. these are perfect for all occasions. Enjoy!

Monday, January 11, 2010

Roma Tomato and White Wine Pasta Sauce

You asked for it, you got it! K and I love to make Italian food. This love probably comes from the fact that we are both half Italian. K is a pro at making delicious homemade pasta and I happen to love making sauces. This sauce in particular is one of my favorites. Store bought sauces tend to be over flavored which over powers your senses and your taste buds. This sauce is beautifully pure and incredibly simple. You taste the freshness of the tomatoes, the richness of the white wine (no worries, the alcohol is burned out) with the touches of fresh garlic and basil. I found this sauce in my Williams-Sonoma Italian Favorites recipe book. I made a few changes to the recipe but not many.

Here's the recipe:

6 Tbls EVOO
5-6 cloves of garlic
1 1/2 C White cooking wine
10 Roma tomatoes
Salt
Pepper
1 Tsp. Basil

Start by bringing a large pot of water to boil. Fill a large bowl with cold water and ice. On one side of the tomato you are going to take out the small pit (where the stem was). On the other side you are going to make a small X with your knife.

Once the water is boiling, add five tomatoes to the pot. Boil until you see the skin start to peel off. This can take 30 seconds to a minute. Once the skin starts peeling off, put the tomatoes into the bowl of ice cold water. Repeat with the remaining tomatoes.

Peel the skins off of the tomatoes and places the skinned tomatoes on a cutting board. The skins should come off very easily.

Here's the final result. The tomatoes are peeled and ready to be chopped.

Chop the tomatoes and place in a large bowl. I chop my tomatoes into pretty large chucks. Also, chop your garlic and put in a smaller bowl.

Empty out your large pot of water, dry off and add the olive oil. Heat your olive oil at medium-high heat. Once your oil is hot, quickly lower your heat and add the garlic. You do not want your garlic to cook too fast, so have it cook in the oil at a low temperature. You want it to simmer in there until it becomes a golden brown as seen below.

Once your garlic is ready, add the white wine and raise your heat to high. Be careful!! The oil could splash up and burn your skin! Cook until the wine evaporates which should be a good 3-5 minutes.

Once the alcohol burns off, add your tomato chunks, basil, salt and pepper to taste. Let your sauce cook uncovered, stirring ofter, until it thickens. Do a taste test. Does it need more salt, pepper, or basil? Be careful not to add to much but a little at a time. Once your tomatoes are soft you can turn you heat down to low and let it simmer until you are ready to eat. Don't forget to stir occasionally.

The final result is amazing. Sometimes right before I serve it I will add a couple leaves of fresh basil. You don't have to but if you have some lying around might as well! Serve with any type of pasta you want.

I have been asked so many times for the recipe and finally found time to blog about it. I hope you enjoy it as much as we do. Enjoy!

Saturday, January 9, 2010

Peanut Butter Cookies

One of K's all-time loves are peanut butter cookies. Every time we are at a bakery he always purchases one (or maybe two). The surprising thing is we do not always make them at home. There's no reason behind this, I think the peanut butter cookie gets lost in the jumble of cookies to make. This sad discovery is now about to change, starting today. From our beloved Betty Crocker 1963 "Cooky Book" we enjoy one of life's greatest little treasures...a yummy peanut butter cookie with a glass of milk.

Here's the recipe:

1/2 C Shortening
1/2 C Peanut butter (we love creamy but crunchy works as well)
1/2 C Sugar
1/2 C Brown sugar (light or dark)
1 egg
1 1/4 Flour
1/2 tsp Baking powder
3/4 tsp Baking soda
1/3 tsp Salt

Start by mixing the shortening, peanut butter, sugar and eggs with a mixer. Make sure it is mixed all the way through.

Sift you flour into a large bowl. Add the remaining dry ingredients. Slowly add the dry ingredients to the shortening mix.

Taste test the cookie dough... okay you don't have to but I can't resist:-) Wrap the dough up and place in the fridge to chill.

Pre-heat oven to 375. We keep the dough in the fridge until the oven is heated.

Roll out dough into small balls. Roll the cookie dough in sugar and place on the cookie sheet. Using a small cup gently press the dough. Using a fork make a criss-cross pattern on the top of each cookie. Bake in the oven for 8-10 minutes or until golden.

While the cookie dough bakes, place the remaining dough back into the fridge. Continue this pattern until all the dough is gone.

Let the cookie rest on pan for a few minutes before cooling them on a wire rack or paper towel. Serve with a nice cold glass of milk.

These cookies are deliciously rich and amazingly delish. We could make them everyday. They are great to keep for yourself or give to family, friends, or neighbors. Enjoy!

Quiche Lorraine

I LOVE quiches. I think they're the best things on earth. Hot or cold, a nice piece of quiche is always a welcomed site. We've tried many recipes and have come up with our own. Try it out as is or add other items... skies the limit.

Here's the recipe:

Pastry for a 9-inch Crust Pie
6-8 slices of Turkey Bacon
1 1/2 C. shredded Swiss cheese
1/3 heaping C of onions (finely chopped)
4 Eggs
2 C Half-and Half
1/4 tsp. Salt
1/4 tsp. Pepper
1/4 tsp. Garlic powder

Pre-heat 425. Start bymaking the pie crust. Bake your crust for 10 minutes with foil wrapped around the edges. Take the foil off and bake for another 3 minutes. Set aside. Reduce the oven to 325.

Cook the bacon in a frying pan. Fry until crispy. Crumble and set aside. You can use regular bacon for this recipe as well. We like turkey bacon because of the smoky flavor and it's a little healthier than pork.


Shred cheese and set aside 1 1/2 cups. Finely chop 1/2 of an onion. This will most likely be a 1/3 cup.
Add the crumbled bacon, onion and cheese to the crust.

In a large bowl, beat eggs with a wisk. Add half-and-half, salt, garlic powder and pepper.

Bake the quiche at 325 for 45-50 minutes. Use the cake method by dipping a knife at the center of the quiche. It the knife comes out clean take it out of the oven. Let it rest for 10 minutes before serving.


As I said at the beginning, you can always add vegetables if you'd like. For example, add broccoli or spinach. This quiche is so yum- delish. If you don't finish it, you can store in the fridge. Enjoy!

Friday, January 1, 2010

Green Beans sauteed in White Wine & Garlic

The first time I had this dish was the first time I met K's family over four years ago. It immediately turned into my favorite side dish! it's very, very simple but has a rich and beautiful taste.

Here's the recipe:
3/4-1lb fresh green beans
2-4 TBS butter
4 garlic cloves, chopped
1/4c White cooking wine
salt and pepper to taste

Start by washing the green beans and snapping off the ends

Melt the butter in a sauce pan on med heat. You can use more or less butter depending on your preference and the amount of green beans you are using. Add the garlic and saute for a minute or so stirring constantly. Garlic can burn quickly so keep an eye on it.

Add the green beans and saute them for 2-3min stirring constantly. Then add the white cooking wine and cook for several minutes until the wine has completely burned off, the garlic may start to brown a little so again be careful not to let it burn.

Transfer the green beans to a dish and enjoy a rich and delicious side dish that is ready in minutes, but will impress any guest.

Enjoy!!

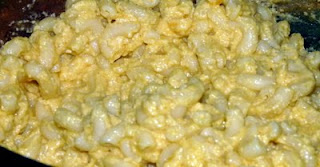
Slowly-cooked Mac & Cheese

Everyone has a favorite Mac & Cheese recipe (and no, the blue box doesn't count). This recipe is ours. It's based off of a Paula Deen's Creamy Macaroni & Cheese recipe from the Food Network. I changed the portions up a bit and substituted Whole Milk with Skim. I can't begin to tell you how good this Macaroni & Cheese is.

Here's the recipe:

1 C. Uncooked elbow macaroni
2-3 Tbl. Butter
2 1/2 C. Grated sharp cheddar cheese
2 Eggs, beaten
1/4 C. Sour cream
1 can Cheddar cheese soup
1/4 tsp. Salt
1/2 C. Skim milk
1/4 tsp. Dry mustard
1/4 tsp. Black pepper

Bring a large pot of water to boil. Add the uncooked elbow macaroni to the boiling water and cook until tender. Drain.

In a saucepan melt the butter and grated cheese until the cheese is completely melted.

Set your Crock Pot on low and add the following: melted butter/cheese mixture, eggs, sour cream, soup, salt, milk, dry mustard, and pepper. Stir. Now add the drained macaroni and stir again. Put the lid on your Crock Pot (or slow cooker).

Keep your Crock Pot setting on low and cook for 3 hours, stirring every now and then.

Your final product will be delicious and creamy.

This recipe takes a while to cook but takes very little effort on your part. It's definitely worth trying! Enjoy!